
Creating your First Source Plugin
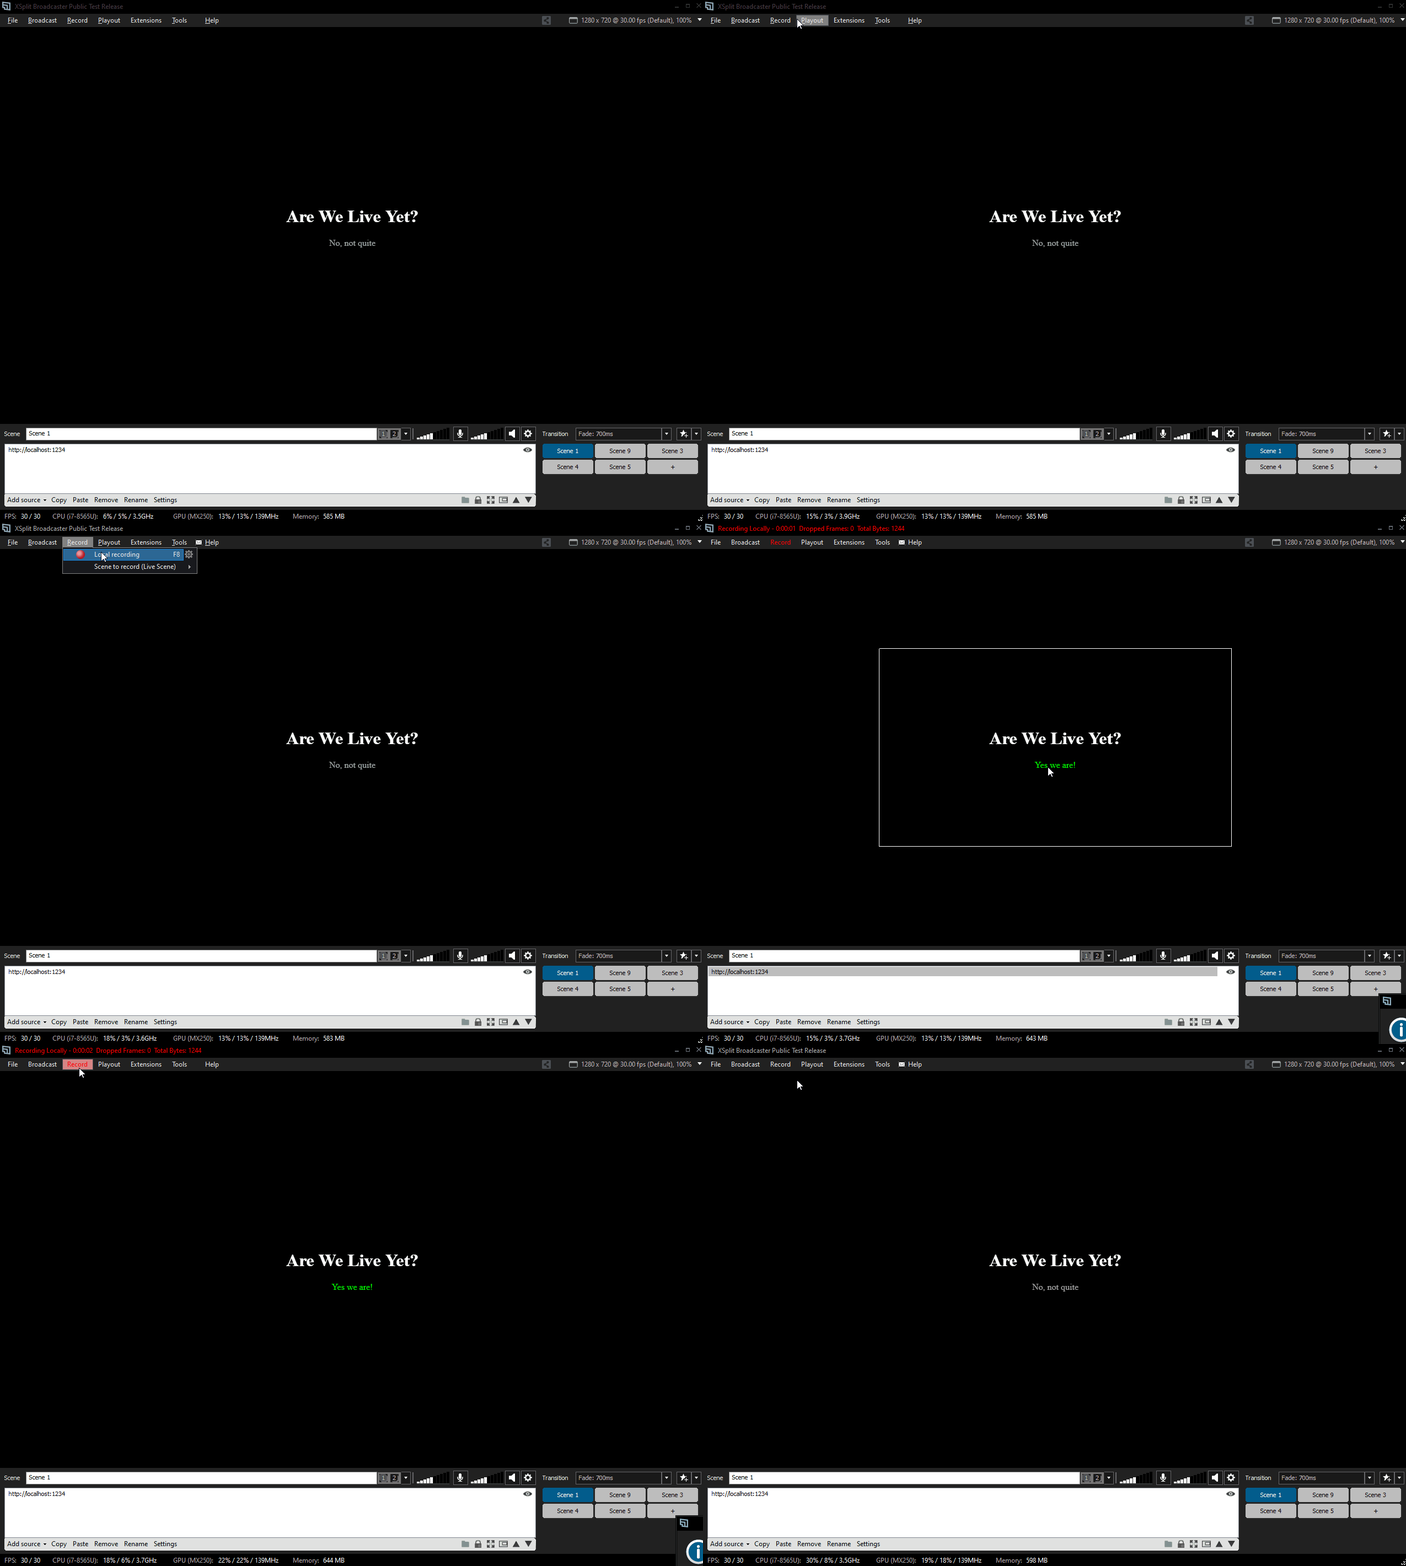
For the sample plugin, we'll aim to create a plugin that would display if we're currently streaming/recording or not. Not really a useful source plugin, but that should do.
Project setup
For this project, we'll be using Parcel as our project bundler, since it's the easiest bundler to use (it's literally a plugin-and-play bundler :D). Ok, so let's get on with the steps:
Create a folder for your project. We'll name it as
are-we-live-yet.Open up the folder in command line. I'll be using powershell, but you're free to use any command line you want.
cd ~/path/to/are-we-live-yetInitialize an npm project, and install our dependencies
npm init
npm i parcel-bundler xjs-framework@3.0.0-alpha.5
Update
package.jsonand add some Parcel JS scripts that we'll use when bundling our plugin.// Under "scripts", add the following: "dev": "parcel index.html", "build": "parcel build index.html" // It should look like this: "scripts": { "dev": "parcel index.html", "build": "parcel build index.html" }Lastly, create an
index.htmlfile and anplugin.jsfile... this would contain the source code of your plugin.
Ok, with the setup done, let's work on the plugin.
Completing the Plugin
Here's how our index.html should look like:
<!DOCTYPE html>
<html>
  <head>
    <title>Are We Live Yet</title>
  </head>
  <body>
    <style>
      div {
        background-color: black;
        color: white;
        text-align: center;
      }

      body {
        display: flex;
        align-items: center;
        justify-content: center;
        height: 100vh;
        margin: 0;
        padding: 0;
      }

      p {
        color: rgb(167, 167, 167);
      }

      .yes {
        color: rgb(0, 255, 0);
      }
    </style>

    <div>
      <h1>Are We Live Yet?</h1>
      <p id="output">No, not quite</p>
    </div>

    <script src="plugin.js"></script>
  </body>
</html>
The important part of the plugin above is the <script src="plugin.js"></script> part, and the <p id="output">No, not quite</p>.
The script tag adds your plugin.js file into the page, while the <p> tag is the node where we'll update the text to display the correct streaming status.
Here's the contents of our plugin.js file:
import Xjs from 'xjs-framework/core/xjs';
import Events from 'xjs-framework/core/events';

const output = document.getElementById('output');
const xjs = new Xjs();
const events = new Events(xjs);

events.on('StreamStart', () => {
  output.textContent = 'Yes we are!';
  output.classList.add('yes');
});

events.on('StreamEnd', () => {
  output.textContent = 'No, not quite';
  output.classList.remove('yes');
});
The import statements on the top of the file would tell the bundler to pull in the specific module that we are trying to add to our project. Most bundlers are smart enough to include in all the required dependencies of your imported modules, and leave out the ones that isn't part of the import tree.
We won't delve into the first const statement as it's just a generic assignment to an HTML node that we are going to print our text to. The Xjs-related ones are the remaining lines of code.
First, we need to create an Xjs instance. The Xjs instance holds the necessary information on which XSplit app it would communicate with and use. When you create a new Xjs instance without passing any configuration, Xjs framework will use the XSplit app where the plugin is loaded on.
const xjs = new Xjs();
Next, we'll need to pass the Xjs instance that we created to all other Xjs classes. In this case, we're passing it to the Events class, so that it would know which XSplit app to use and talk to.
const events = new Events(xjs);
And lastly, we're going to use the on method of the Events class to listen to events emitted by XSplit Broadcaster. We'll have an extensive list of possible events that XSplit Broadcaster could emit, but that is still under works. Just know that we tried to avoid too much abstraction on this end, with the objective of allowing you, the developer, on making use of all the events emitted by XSplit Broadcaster even if the Xjs team does not release a new Xjs version.
On our plugin, we just need to listen to the StreamStart and StreamEnd events since that's the whole objective of our sample plugin.
events.on('StreamStart', () => {
  output.textContent = 'Yes we are!';
  output.classList.add('yes');
});

events.on('StreamEnd', () => {
  output.textContent = 'No, not quite';
  output.classList.remove('yes');
});
Awesome, with all that done, let's build our plugin. Execute npm run build and that should create a new dist folder that contains the built files. Drag and drop the index.html file inside the dist folder to your XSplit Broadcaster, and test it out by starting/stopping a stream or recording.